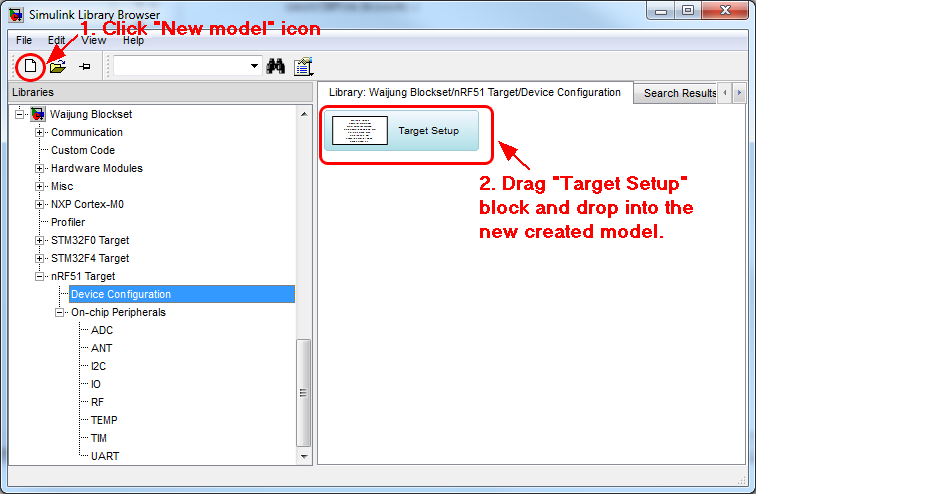
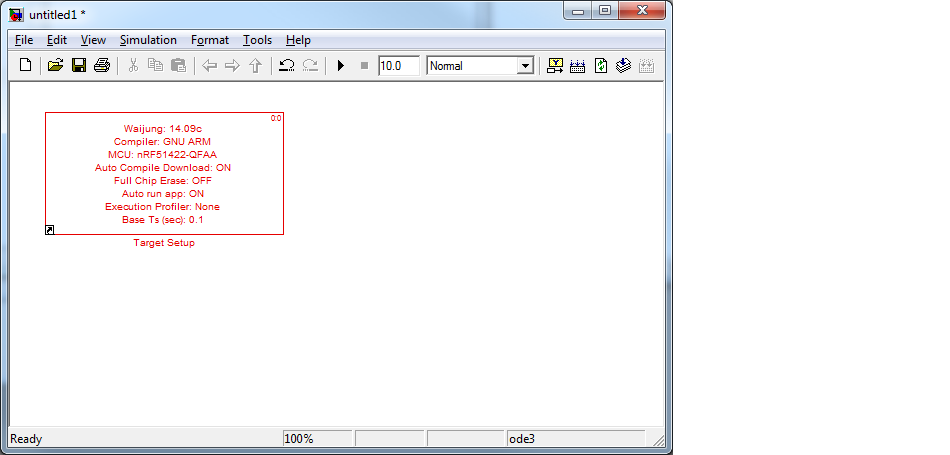
Instruction for creating the Simulink model file used in this demo.
1. Create new and save file
| At shortcut icon bar, click "New model" icon as below picture. |

| Select sub library node under nRF51 Target, drag "Target Setup" block and drop into the new model we've just created. |
| Base sample time. The sample time of "Target Setup" blocks will be use as base sample time(normally in Red color). It is recommended to use 0.1 to 1 second as base sample time of nRF51 Target. |
| Update diagram, by press Ctrl+D keys (2 times). The block will be now in Red color. |

| Save model to file to the disk drive location (not recommended to save to removable drive). |
Note, requirement for file name and directory path:
| ✓ | Non-Unicode (English only) |
| ✓ | Not containing space or special character |
2. Blocks supported for nRF51 Target
| Basic Simulink blocks library can be used in this model. |
| ✓ | Blocks under "nRF51 Target:" node (Device Configuration and On-chip Peripherals) |
| ✓ | aMG Sense Light (Soft I2C) |
| ✓ | aMG Sense Pressure (Soft I2C) |
| ✓ | aMG Sense Temp Humid (Soft I2C) |
| ✓ | Note: More blocks support will be add to later version release |
3. Ready for design model function
This step is model design.
4. Verify blocks sample
Press Ctrl+J to display blocks color and its sample time. Below picture showing an example:

The model has two difference sample time, 0.1 and 0.5 second which represented in difference color.
5. Build model with Auto Compile and Download
| Connect Hardware (FiO Glide + aMG_USBConnect) |
| Press Ctrl+B key to start build process. |
| Wait until auto code generation, compile and download to finish. |


