|
<< Click to Display Table of Contents >> Manual Build MDK-ARM Project |
  
|
|
<< Click to Display Table of Contents >> Manual Build MDK-ARM Project |
|
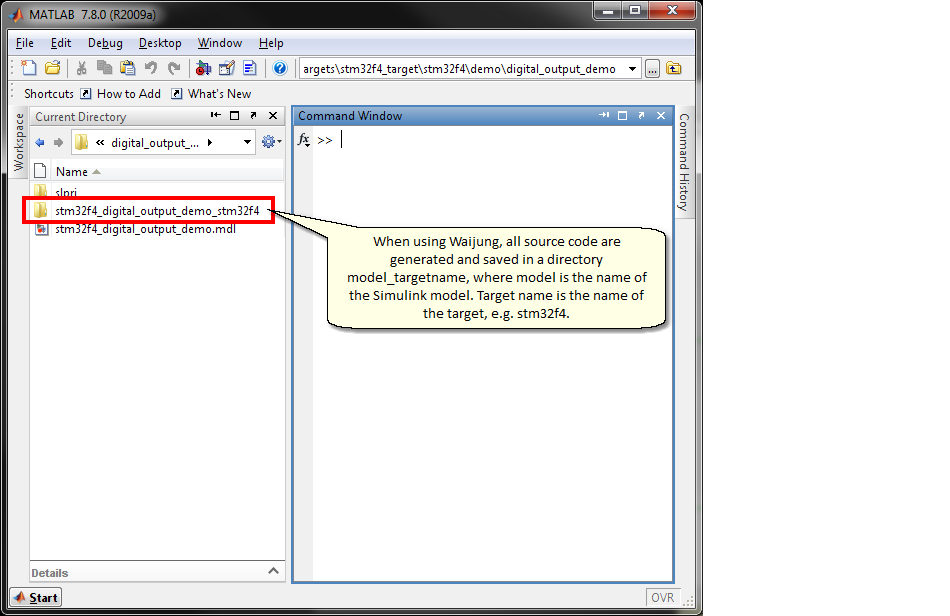
1. Prepare the source code.
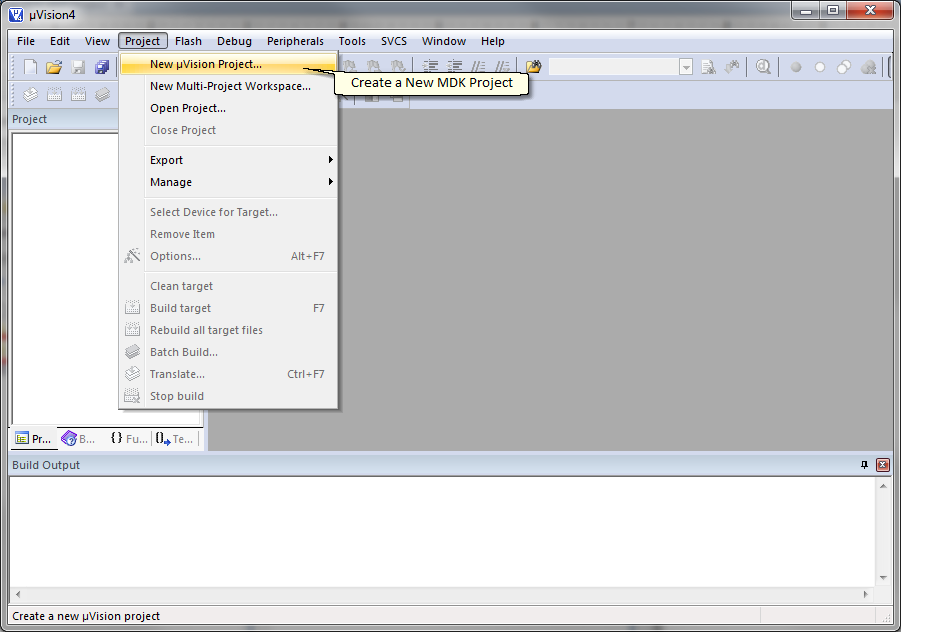
2. Open MDK-ARM and create a new Project.
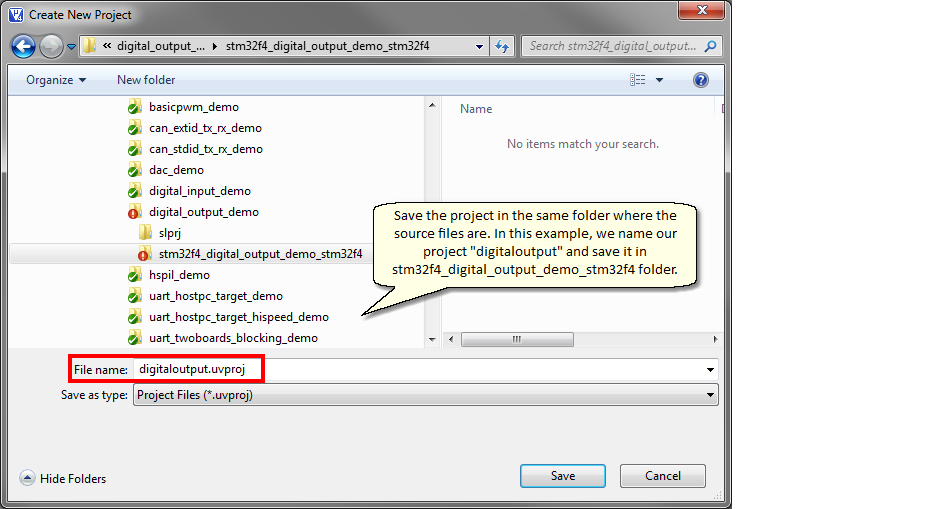
3. Create New Project Window opens, name our project, then click Save.
4. Select target MCU then click OK.

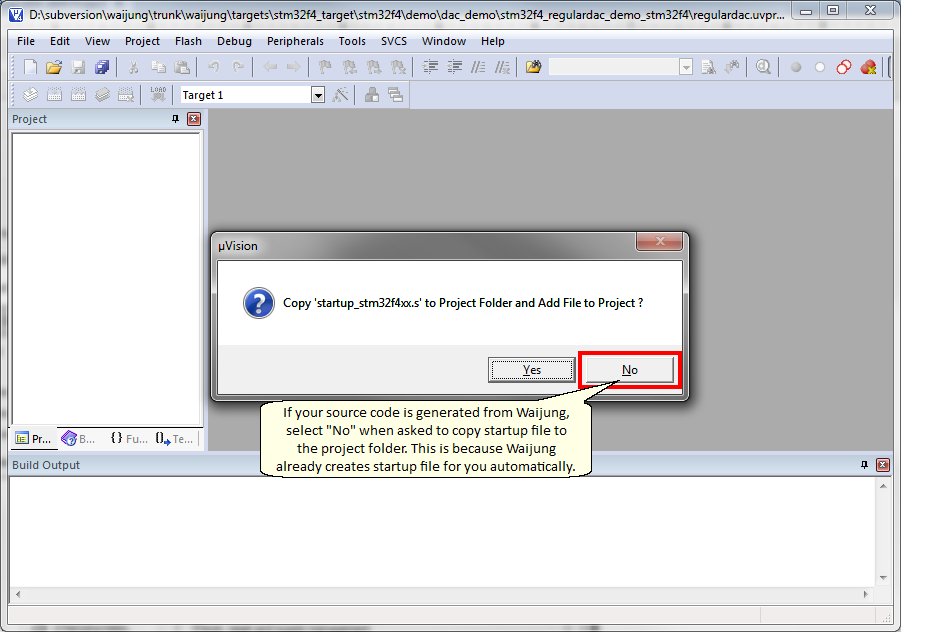
5. Do NOT copy startup file if source code is generated with Waijung.
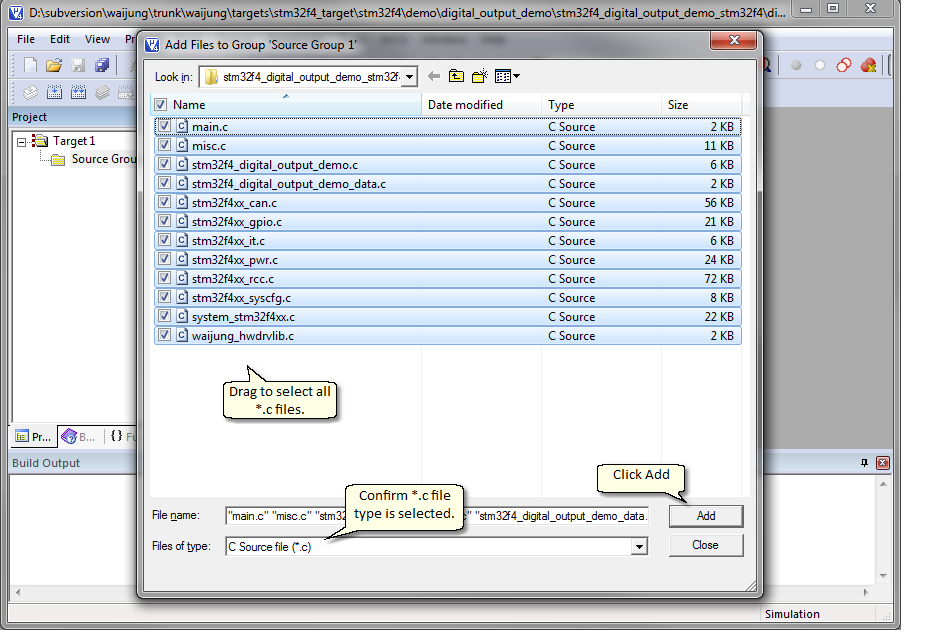
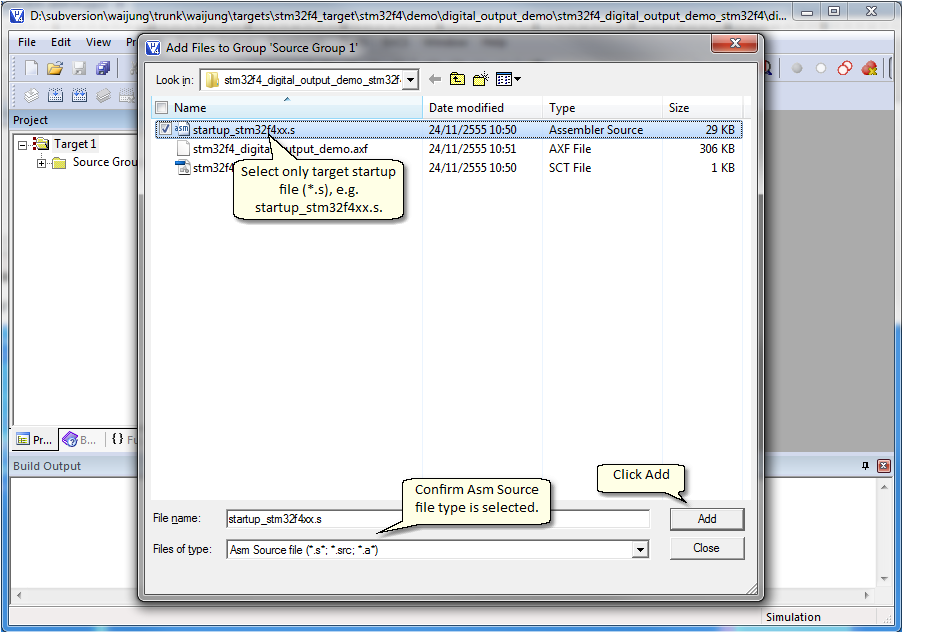
6. Add source files (*.c and *.s) to the project.

6.1 Add *.c source files
6.2 Add *.s source files
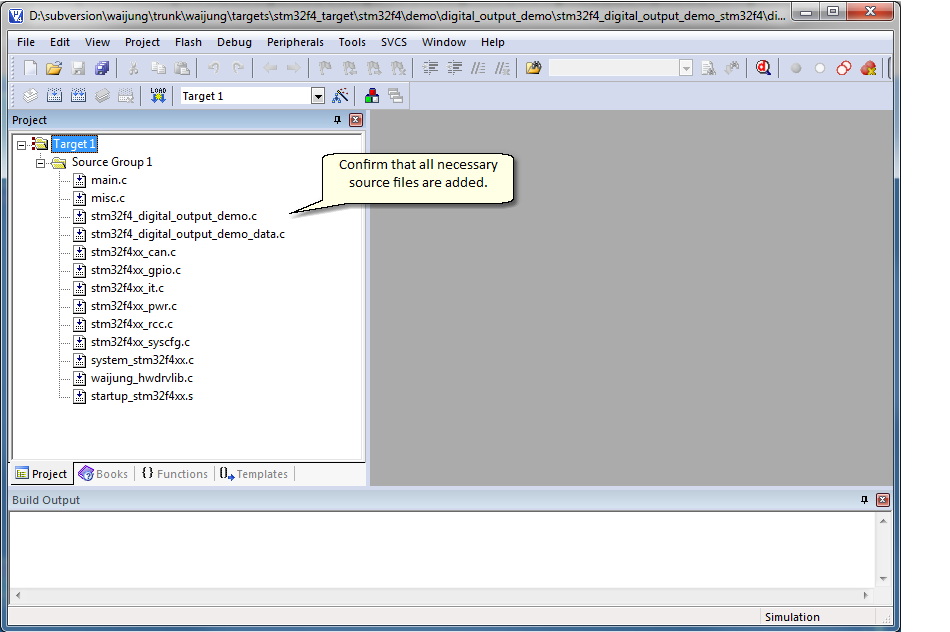
7. Confirm that all source files are added.
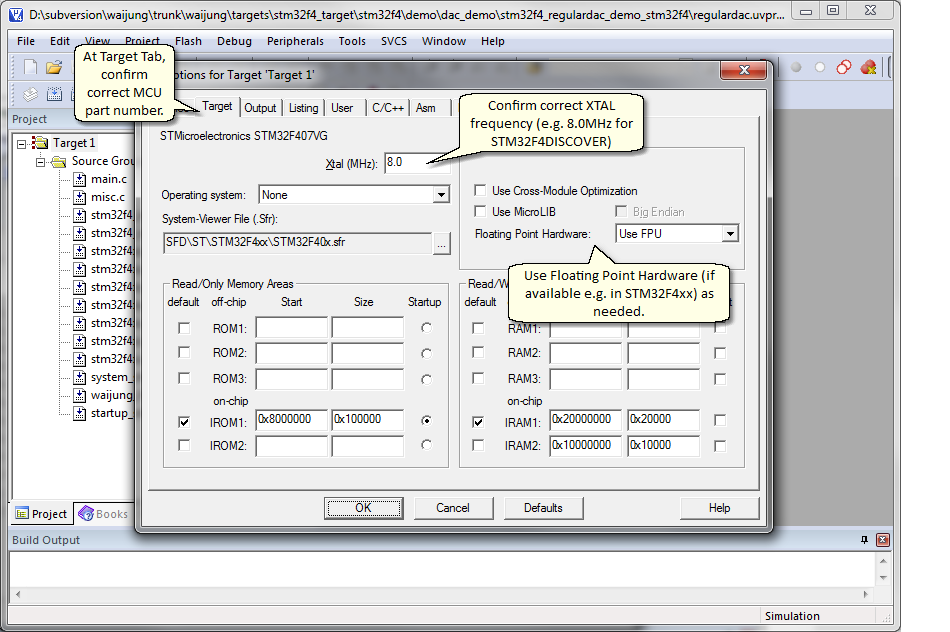
8. Configure Target Build Options.
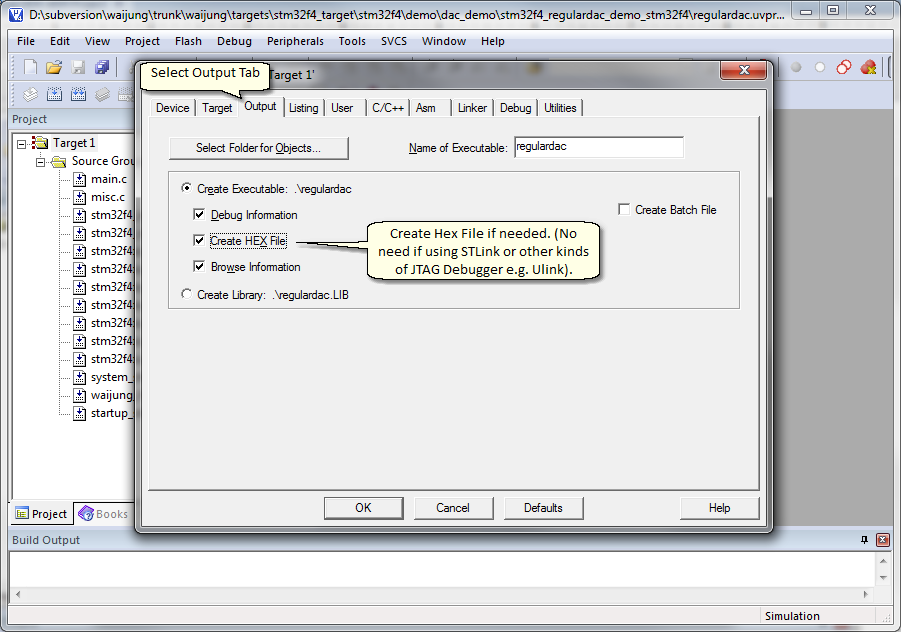
9. Configure Build Output Options.
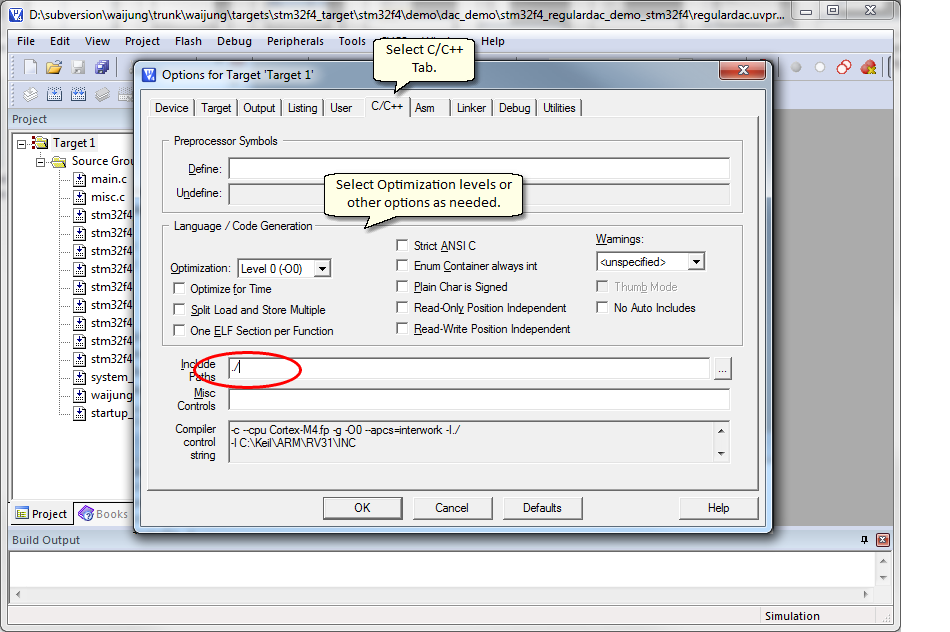
10. Configure C/C++ Options.
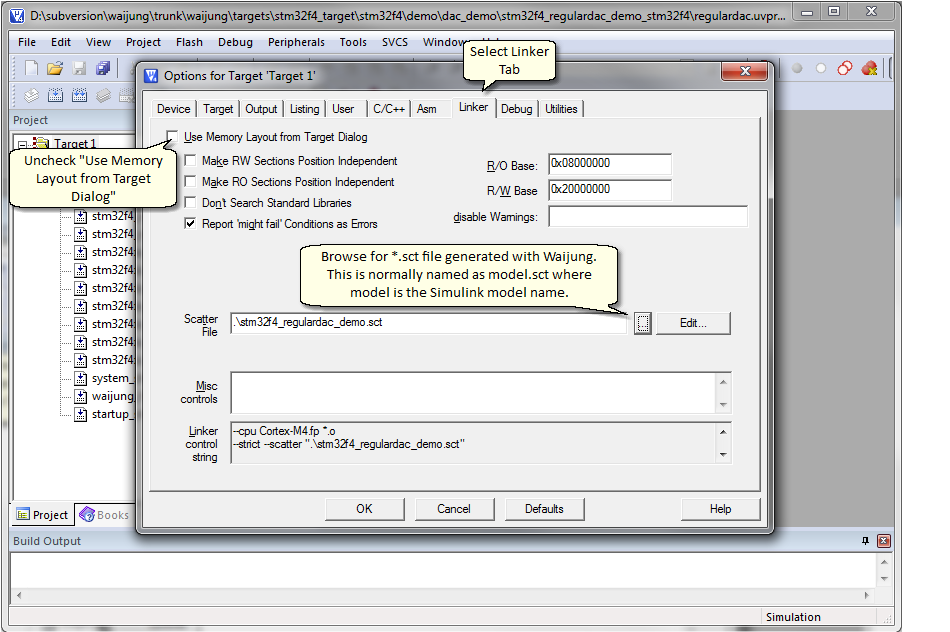
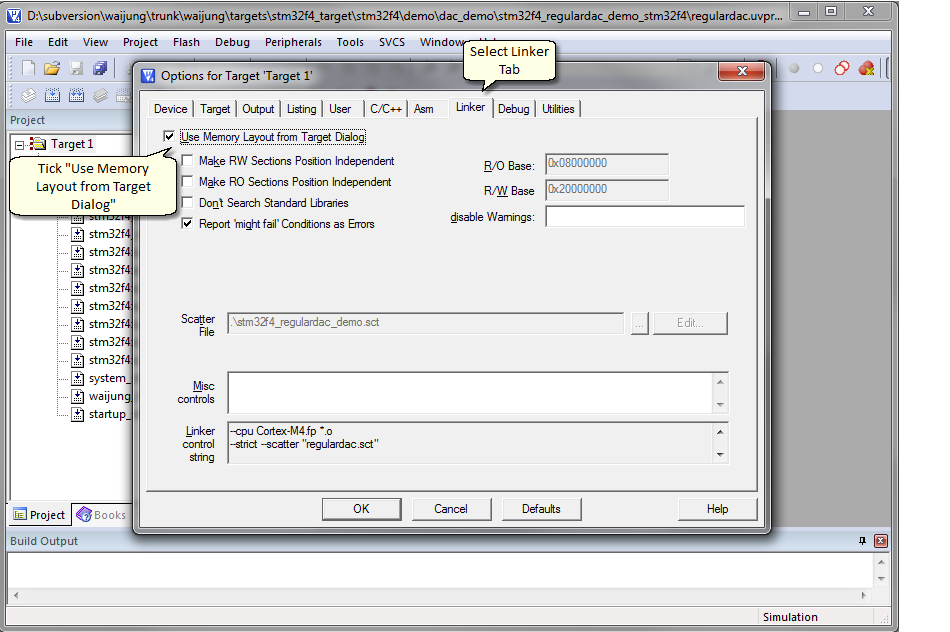
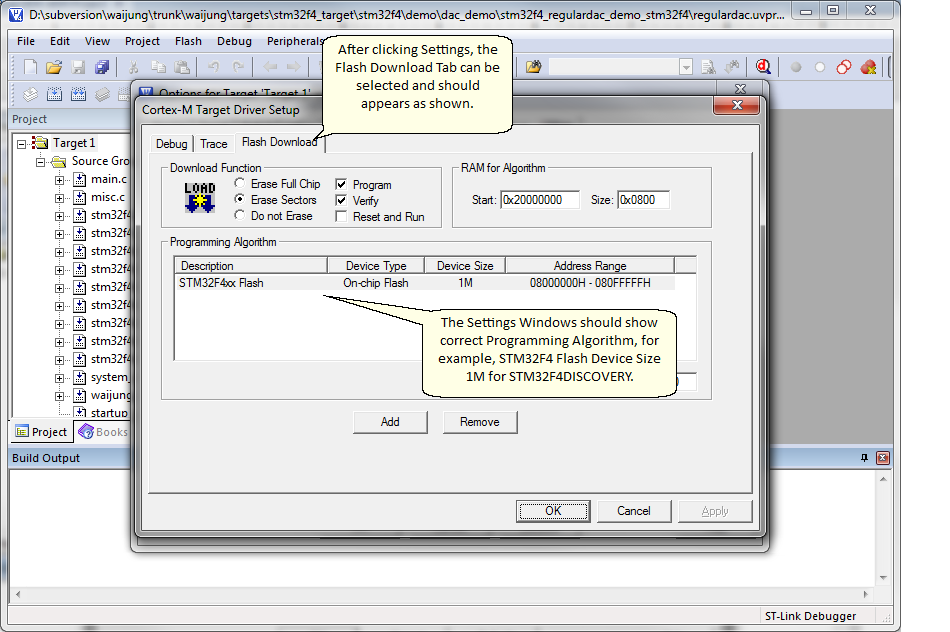
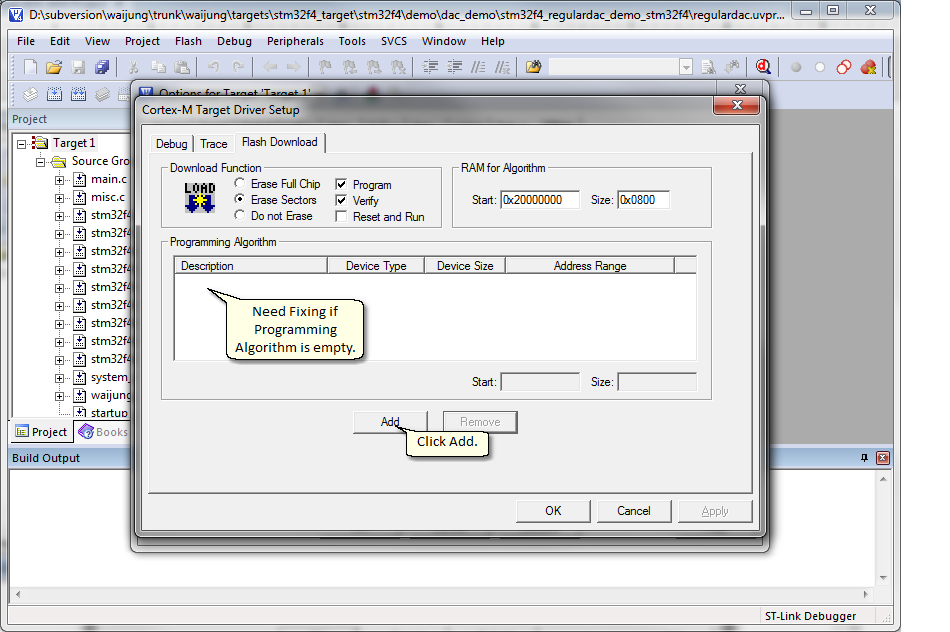
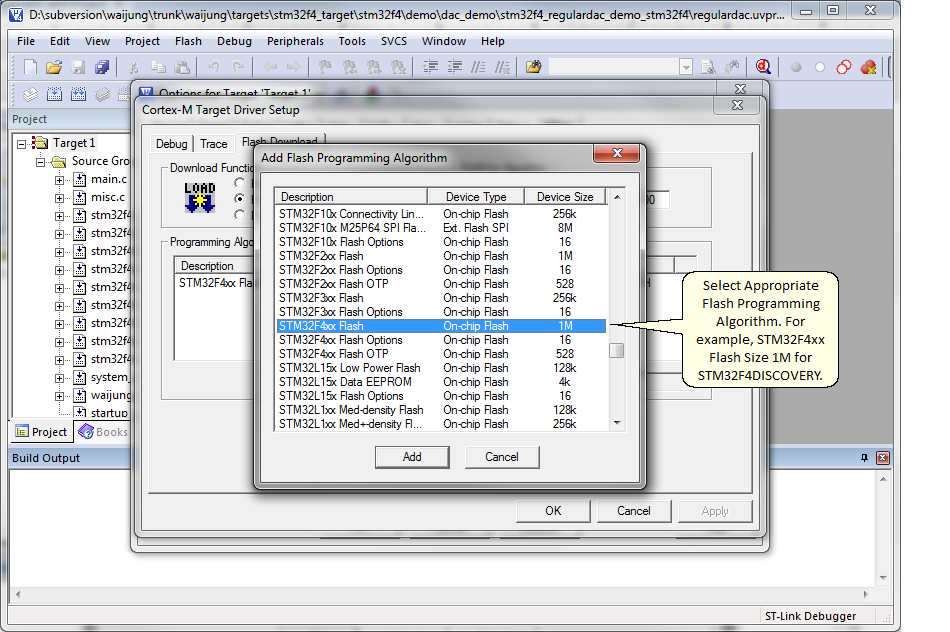
11. Configure Linker Option.
You have 2 choices as shown below either:
| Use Waijung generated scatter (*.sct) file |
| Use MDK-ARM GUI settings |
Linker script controls memory management and linking process and is recommended for advanced users only. If you are not sure what to do follow Use Waijung generated scatter (*.sct) file method below.
11.1 Use Waijung generated scatter (*.sct) file
11.2 Use MDK-ARM GUI settings
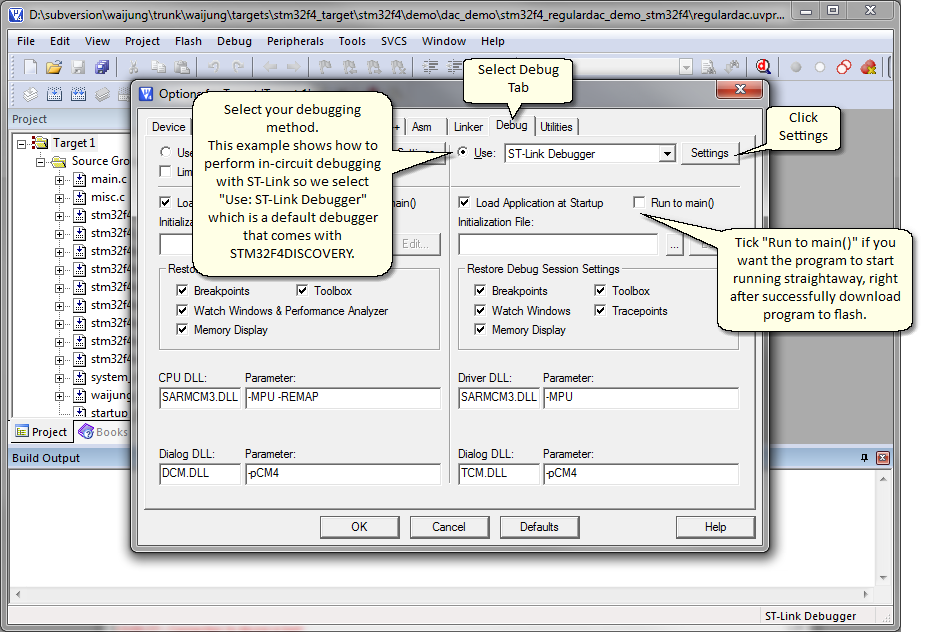
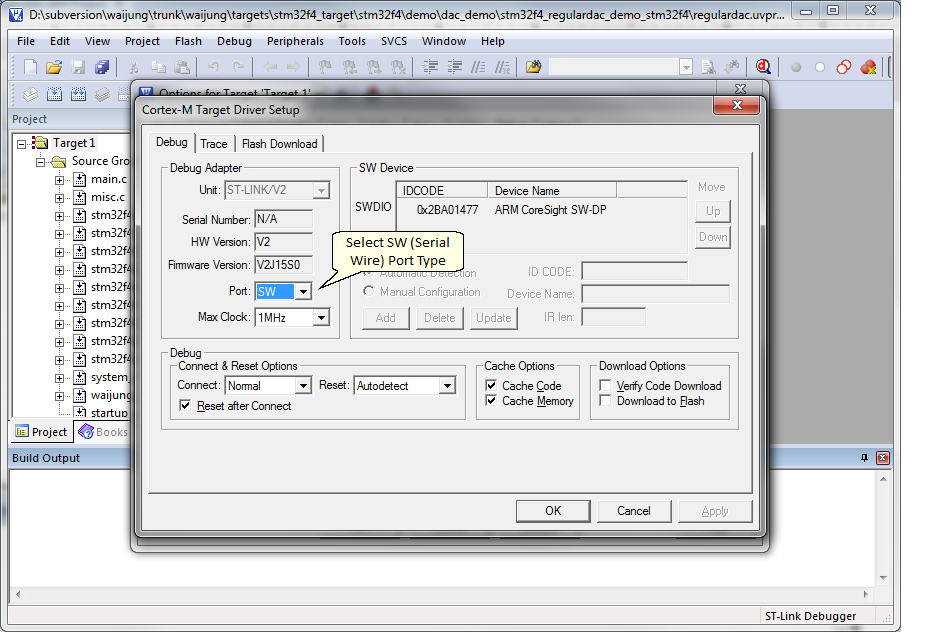
12. Select debugging method.
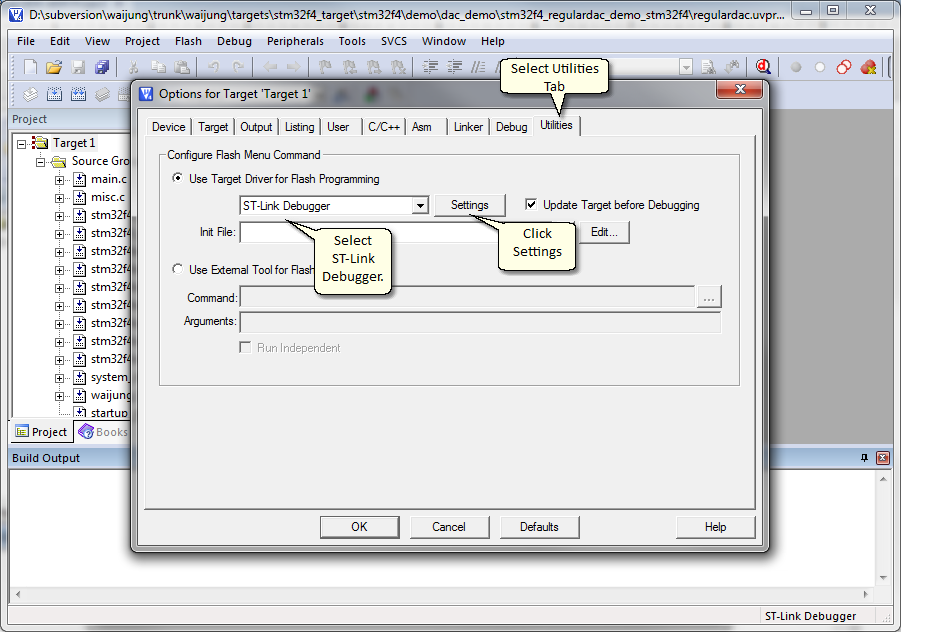
13. Configure Build Utility Option.
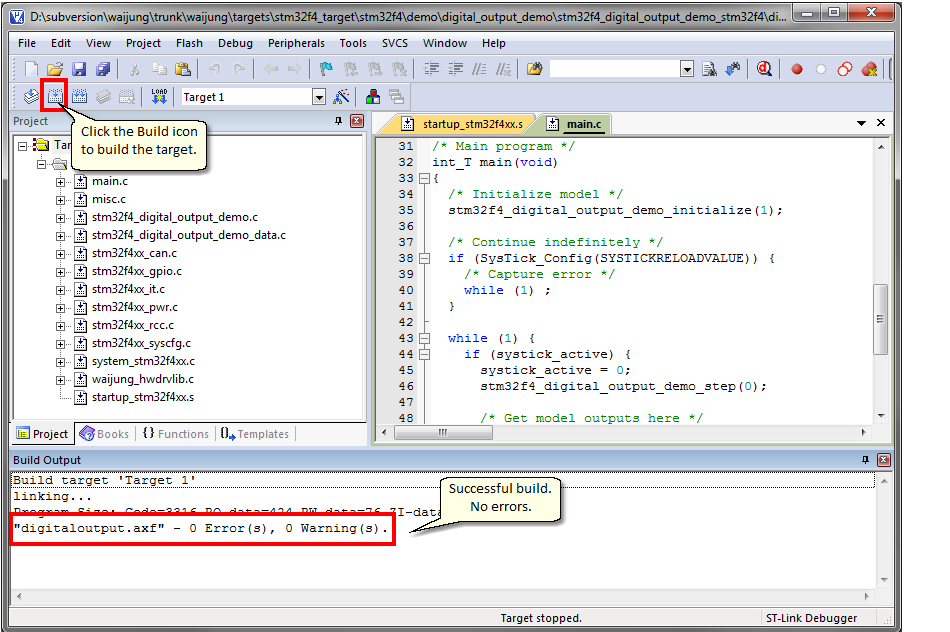
14. Build the target
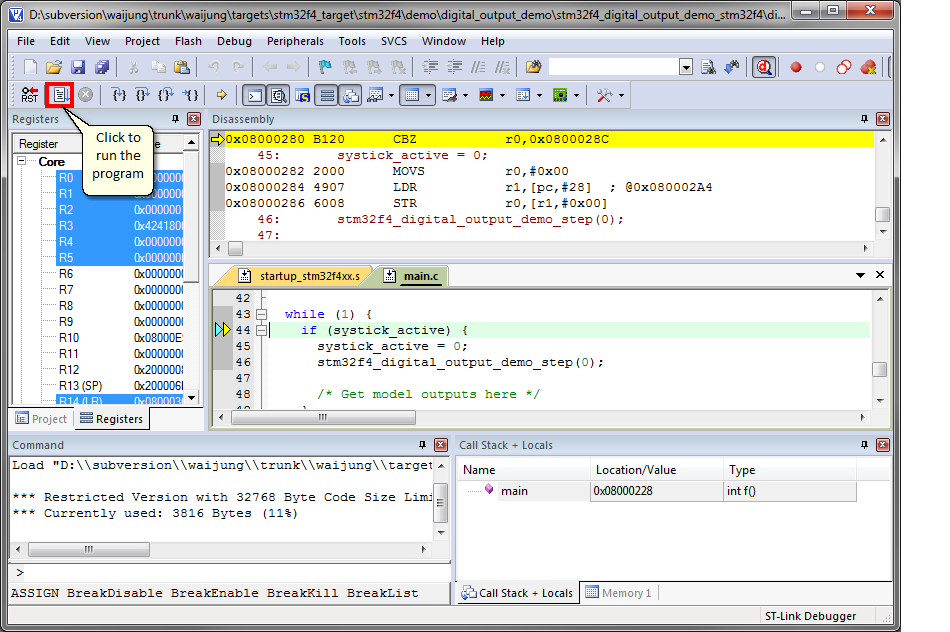
15. Start the debugging process
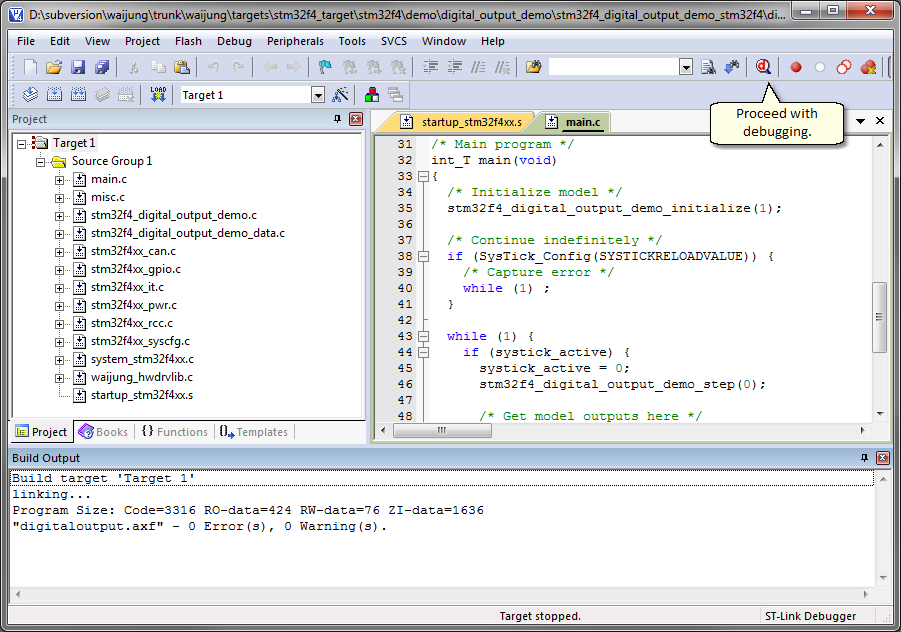
16. Running the program. You should see the MCU doing tasks that it programmed to do.