|
<< Click to Display Table of Contents >> Basic Custom Code (Non -Scalar Signals) |
  
|
|
<< Click to Display Table of Contents >> Basic Custom Code (Non -Scalar Signals) |
|
demo File: stm32f4_matrix_customcode_demo.mdl
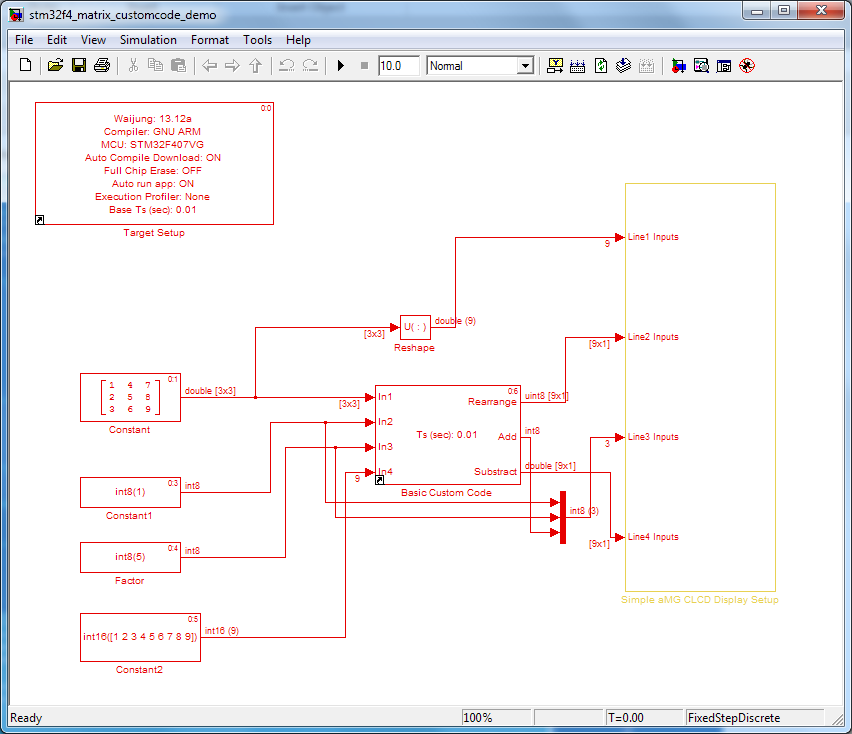
This example demonstrates how to use the Basic Custom Code Block.
Input In1 is of type double and size 3x3. The content of this matrix is displayed on the first line of a character LCD.
The 1st, 2nd, 8th, and 9th member of In1 are swapped and displayed on the second line the the character LCD.
Out3 (Add) is computed from In2 (Constant1) and In3 (Factor). The result is displayed on the third line of the character LCD.
The vector int16([1 2 3 4 5 6 7 8 9]) In4 is subtracted by 1, outputted and displayed on the forth line of the character LCD.
The results are shown below.

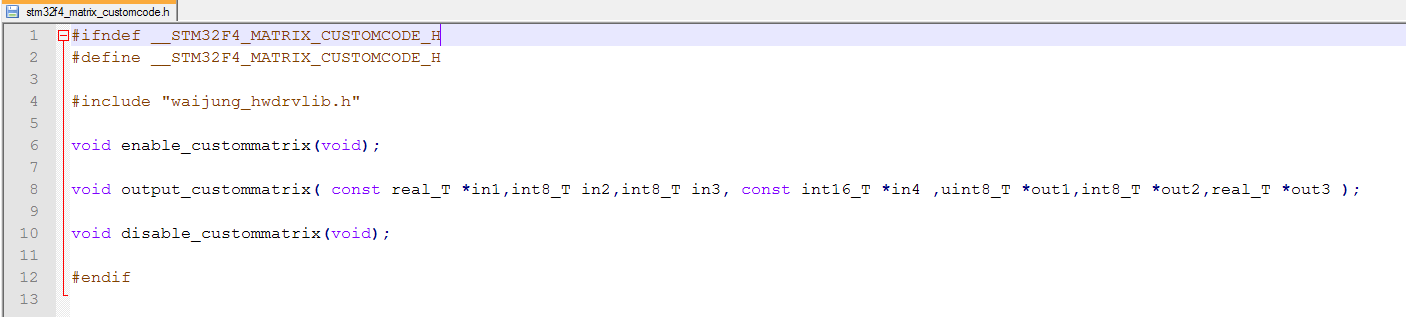
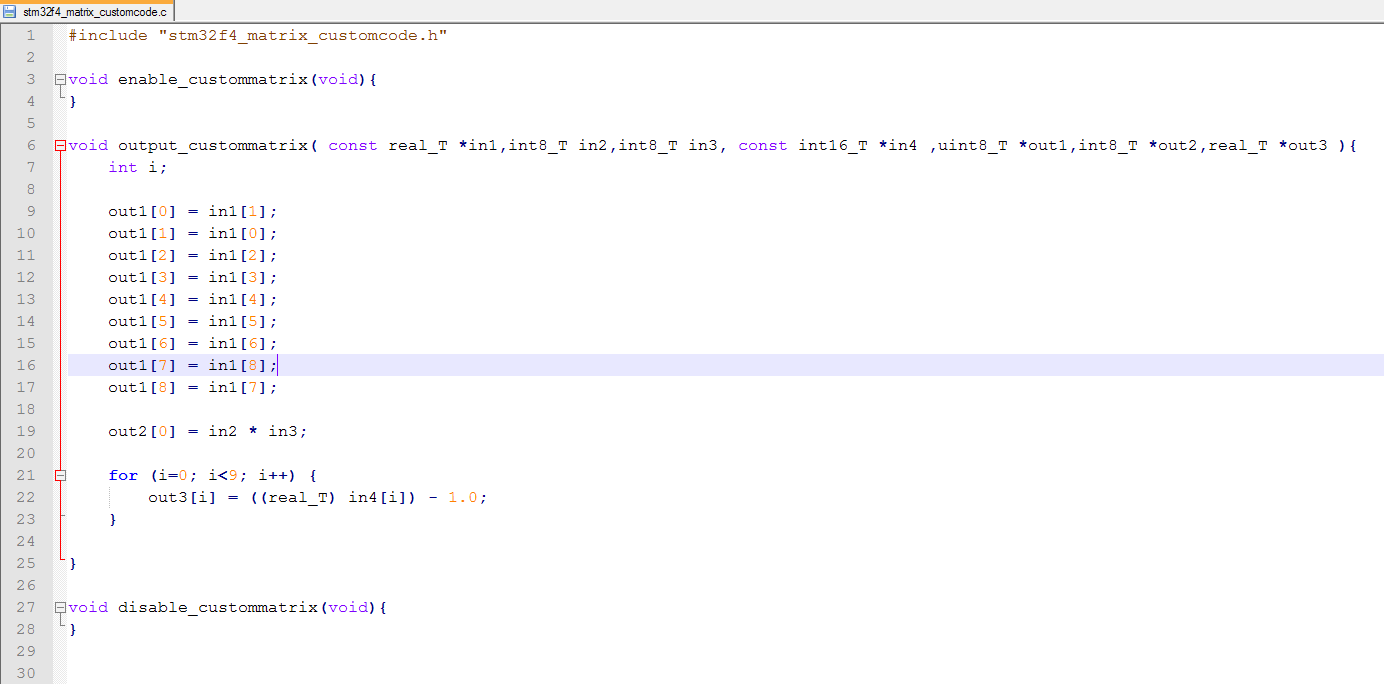
1. In this example there are two custom code files: stm32f4_matrix_customcode.h and stm32f4_matrix_customcode.c as shown below.
2. "Basic Custom Code" block is configured as shown.
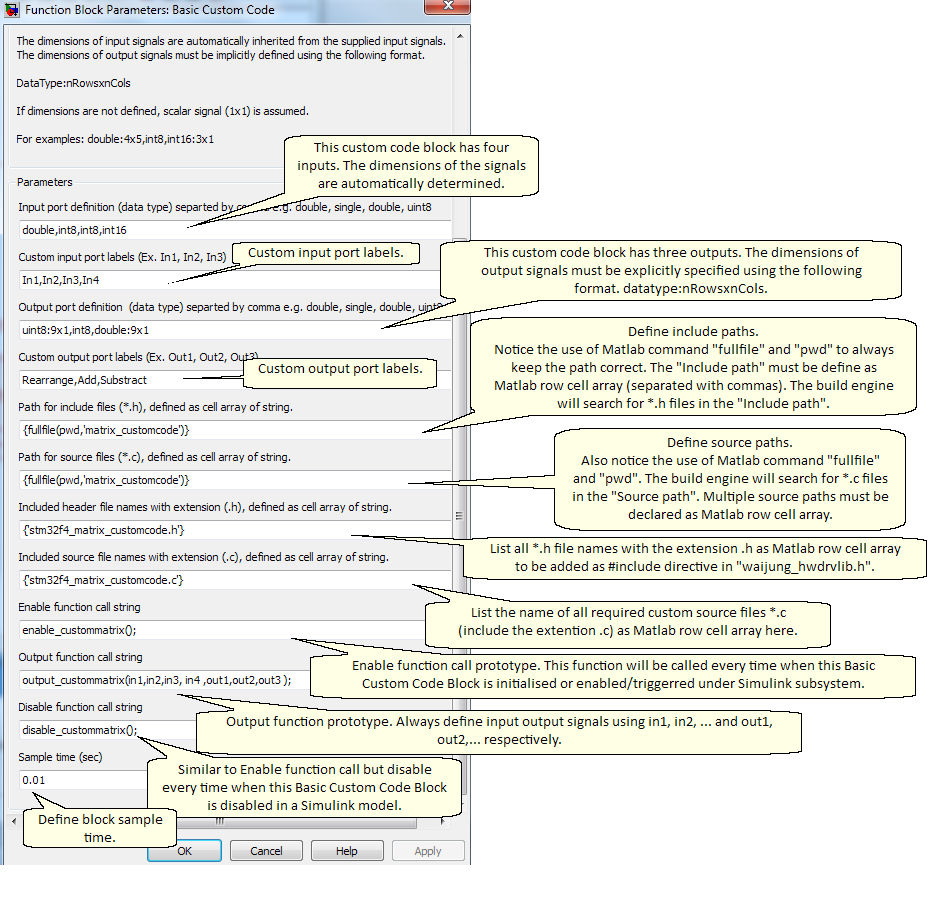
3. The Custom Code Block code generation mechanism uses your configuration information in the Custom Code Block mask above to create corresponding "function wrapper" in the model_step() function and the waijung_hwdrvlib.h and waijung_hwdrvlib.c functions as described in the Basic Custom Code Demo. The differences are in declaration and syntax of input / output parameters of non-scalar signal as follows.
The following show an example code from waijung_hwdrvlib.h for the output function. Notice the use of const keyword and pointer for non-scalar input signal.
/*
* Custom Code Block Output Function
* Block: <Root>/Basic Custom Code
* BlockID: BasicCustomCode
*
* Input Port Definitions
* in1: Port label 'In1', Type: real_T, Size: 9 elements, nRows x nCols: 3 x 3
* in2: Port label 'In2', Type: int8_T, Size: 1 elements, nRows x nCols: 1 x 1
* in3: Port label 'In3', Type: int8_T, Size: 1 elements, nRows x nCols: 1 x 1
* in4: Port label 'In4', Type: int16_T, Size: 9 elements, nRows x nCols: 9 x 1
* Output Port Definitions
* out1: Port label 'Rearrange', Type: uint8_T, Size: 9 elements, nRows x nCols: 9 x 1
* out2: Port label 'Add', Type: int8_T, Size: 1 elements, nRows x nCols: 1 x 1
* out3: Port label 'Substract', Type: real_T, Size: 9 elements, nRows x nCols: 9 x 1
*
* Remark
* Matlab uses one dimensional array to store 2D (Matrix) signal data, by stacking each column of the matrix to form a vector.
* Example:
* In Matlab, A = [1 4 7; 2 5 8; 3 6 9].
* In C, A = [1 2 3 4 5 6 7 8 9].
*/
void output_BasicCustomCode( const real_T *in1,int8_T in2,int8_T in3, const
int16_T *in4 ,uint8_T *out1,int8_T *out2,real_T *out3);
STM32F4DISCOVERY board