|
<< Click to Display Table of Contents >> Firmware upgrade via SD Card |
  
|
|
<< Click to Display Table of Contents >> Firmware upgrade via SD Card |
|
Demo File: app_demo.mdl
Note: File located in directory: \waijung\targets\stm32f4_target\stm32f4\demo\webserver_devicefirmware_upgrade_demo
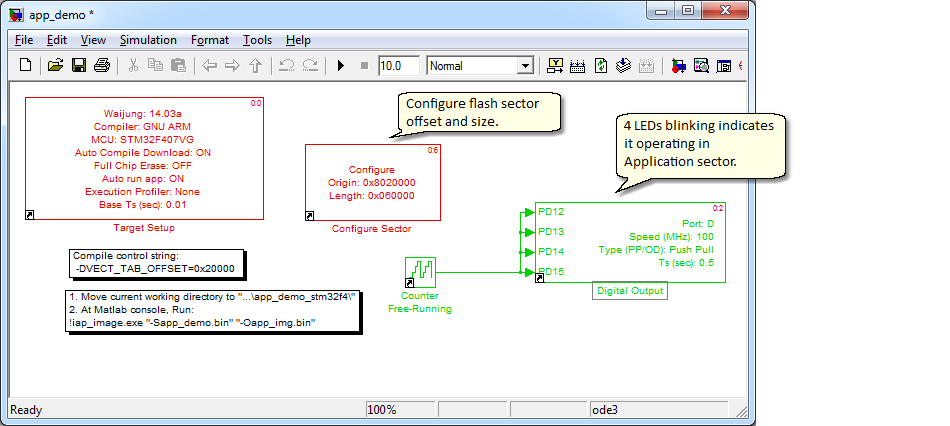
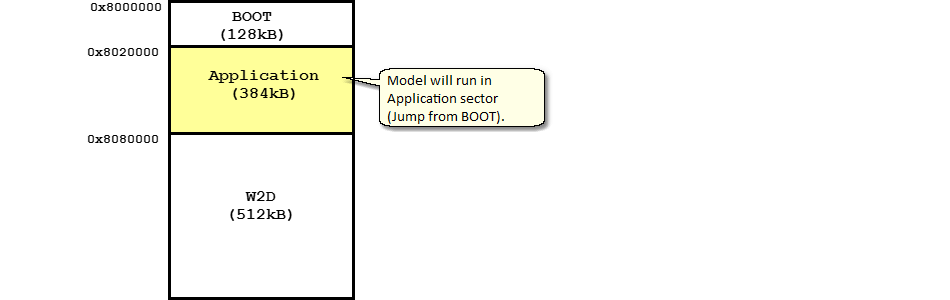
The native MCU reset vector (Entry point) is 0x8020000. This model is build with entry point 0x8020000, it cannot run without boot loader.
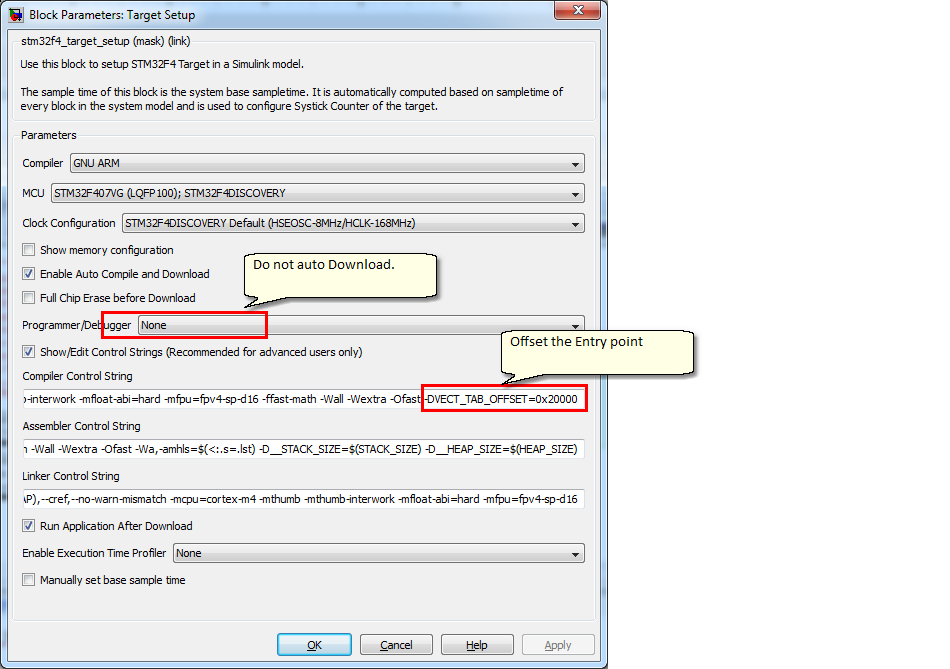
Add define -DVECT_TAB_OFFSET=0x20000 to compiler control string.
If use a custom system configuration file, "system_stm32f4xx.c". Please modify the Vector offset table definition as below:
/*!< Uncomment the following line if you need to relocate your vector Table in
Internal SRAM. */
#ifndef VECT_TAB_OFFSET
#define VECT_TAB_OFFSET 0x00 /*!< Vector Table base offset field.
This value must be a multiple of 0x200. */
#endif
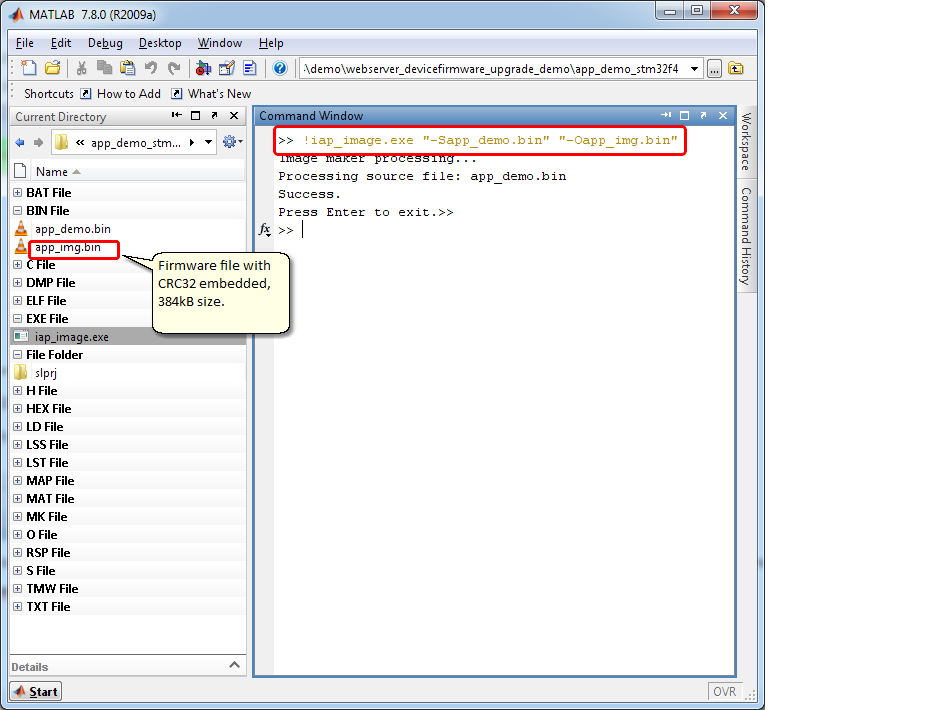
To make sure the firmware file is healthy, the CRC32 value embedded to the last 4 bytes of file. This can be done be running command, follow below steps:
1. Build model with auto Compile but not auto Download
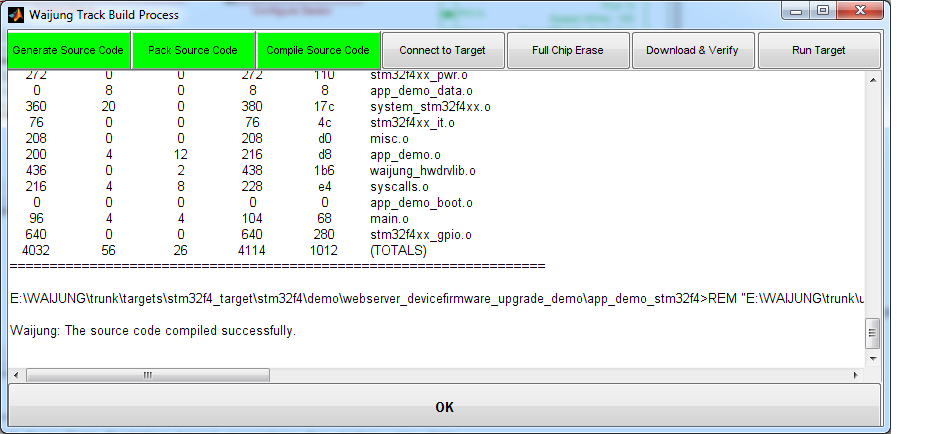
2. Change current working directory of Matlab to "\webserver_devicefirmware_upgrade_demo\app_demo_stm32f4\". Note: this directory containing source files and command line program "iap_image.exe".
At Matlab console, run command: !iap_image.exe "-Sapp_demo.bin" "-Oapp_img.bin"
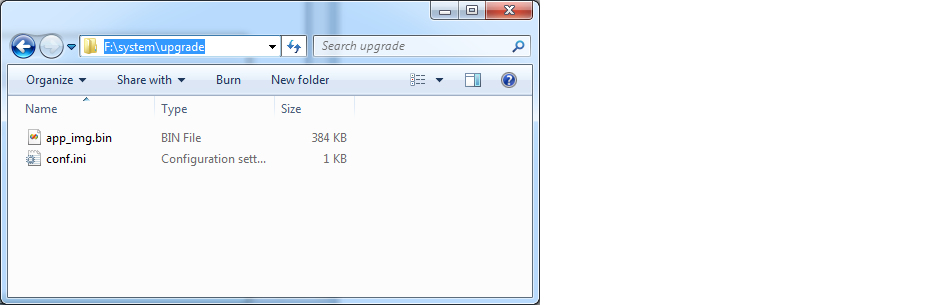
1. Crate directory (SDCard):\system\upgrade\
2. Copy file app_img.bin to the created directory.
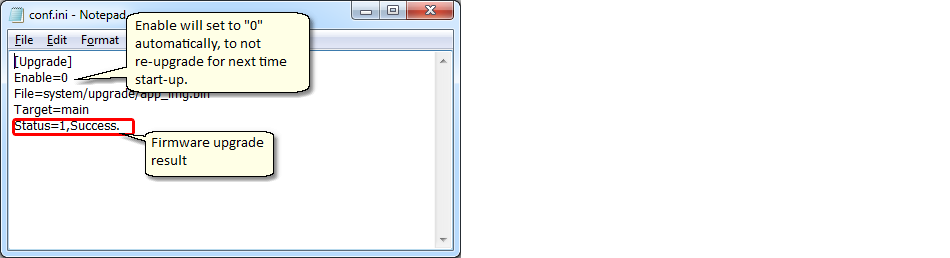
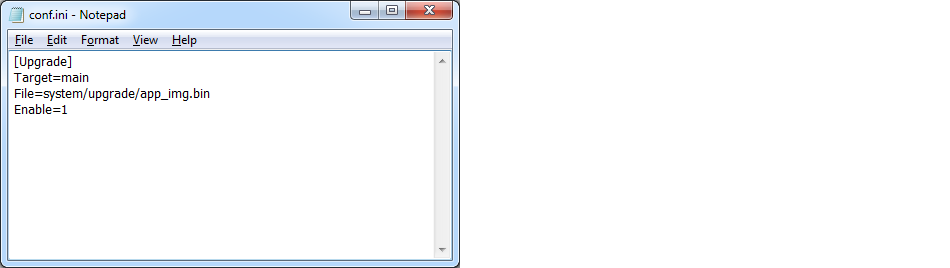
3. Create conf.ini file, contents below:
[Upgrade]
Target=main
File=system/upgrade/app_img.bin
Enable=1
4. The files content of SD card as below:
1. Build and program boot loader into Target board (done once), with demo : Device Boot Loader (SD Card).
2. Disconnect the Target board power.
3. insert SD card to the SD card slot.
3. Re-connect power to the Target board again.
4. Wait for firmware upgrade process, normally 10-15 seconds. In this demo, 4LEDs blinking indicates firmware upgrade is success.
5. Check firmware upgrade status from conf.ini.