|
<< Click to Display Table of Contents >> HTTP method POST and GET for IoT application demo |
  
|
|
<< Click to Display Table of Contents >> HTTP method POST and GET for IoT application demo |
|
This topic demonstrate how to upload data via HTTP POST and download via HTTP GET to IoT server, ThingSpeck. The interface command used by this demo listed below:
| Server: api.thingspeak.com |
| Action: /update |
| Parameter field: |
| i. | api_key = <your_api_key> ; Note: API Key will provided when create ThingSpeak channel. |
| ii. | field1=<Data #1> ; Data field1. For this demo, field1 is a running number of ADC value to upload. |
| iii. | field2=<Data #2>; Data field2. For this demo, field2 is a Voltage value reading from LDR sensor. |
| Server: api.thingspeak.com |
| Request: /channels/<your_channel>/feeds.csv?results=5 ;Note: download 5 latest data in CSV format. |
Note: You have to create your own Channel for Testing.

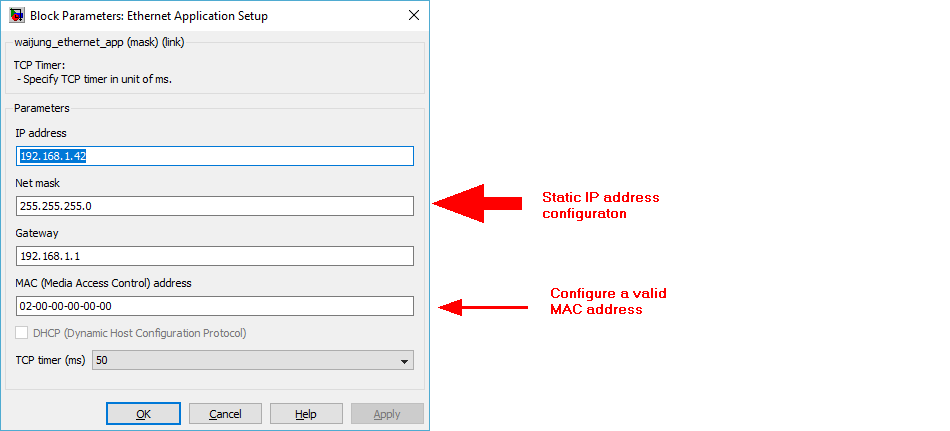
Make sure IP address did not conflict with other device in the network.
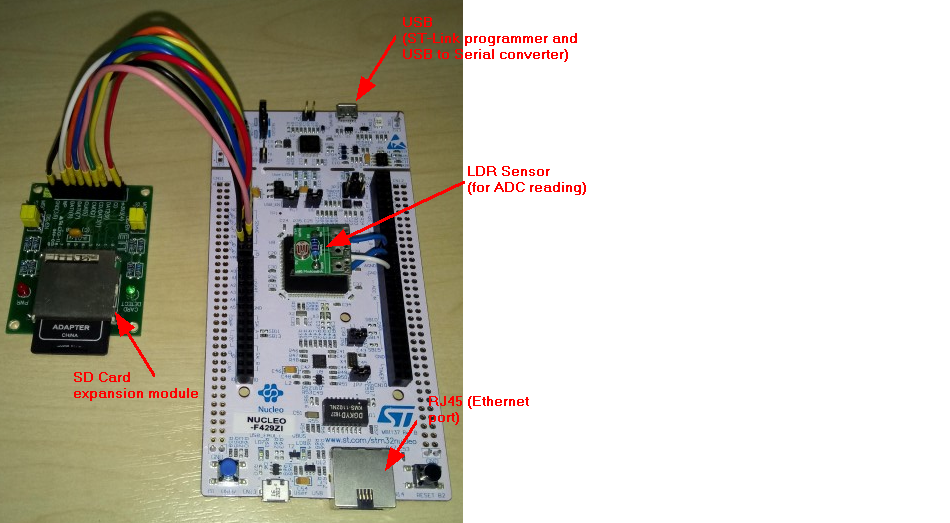
The demo file for NUCLEO-F429ZI board located in directory "targets\stm32f4_target\stm32f4\demo\boards\nucleo_f429zi".
Model file: http_method_post_thingspeak_demo.mdl
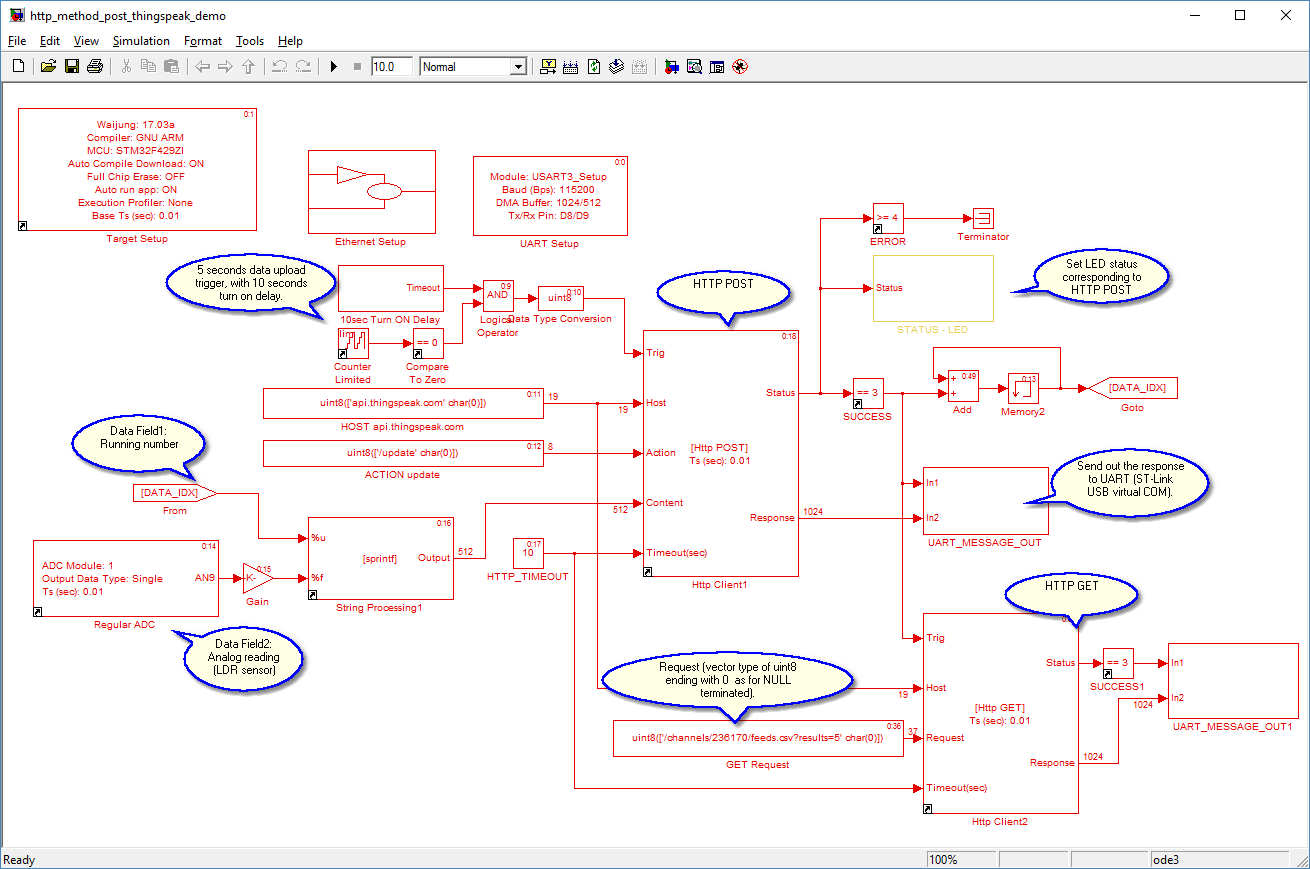
| The Processing time (CPU load) of HTTP POST and GET cannot fitted into one sample time (10ms), so the block designed to work as Non-Blocking mode. |
| A non-zero value to "Trig" input port will start the process. Output Status port will indicate the operation state, BUSY, SUCCESS or FAILED. |
| Turn on delay time required for network initialization. |
The demo use 3 On-board LED for indicates POST data operation status.
| LED1 (Green), Normal is blinking 200ms period indicates software is running. |
| LED2 (Blue), Flashing (turn on for 1 time step) indicate POST operation SUCCESS. |
| LED3 (Red), Flashing (turn on for 1 time step) indicate POST operation FAILED. |
On-board ST-Link of NUCLEO board used for programming/debugging, and also provide USB-Virtual COM port. This demo transmit the Response data to UART3 (PD8/PD9) which will be redirected to USB virtual COM port, the response data can be captured by Serial terminal software.
Run Serial Terminal Software (Putty), with baud rate setting 115200.
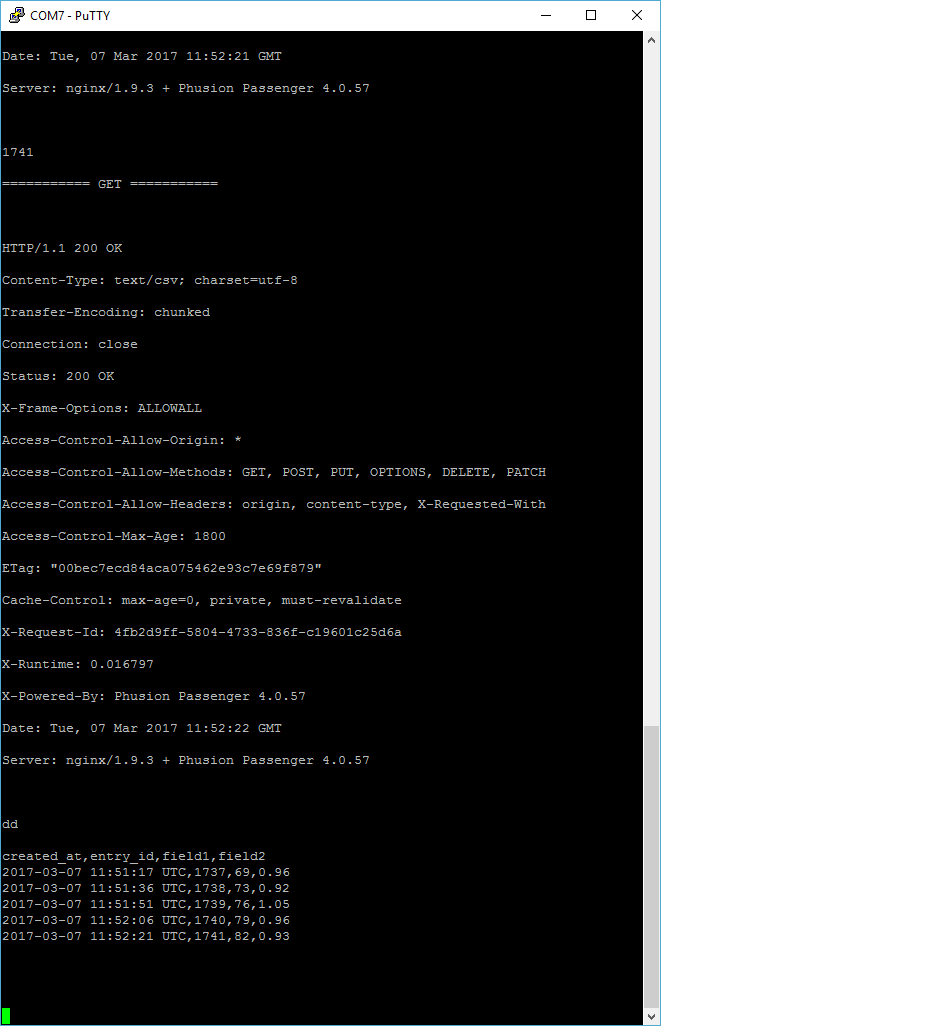
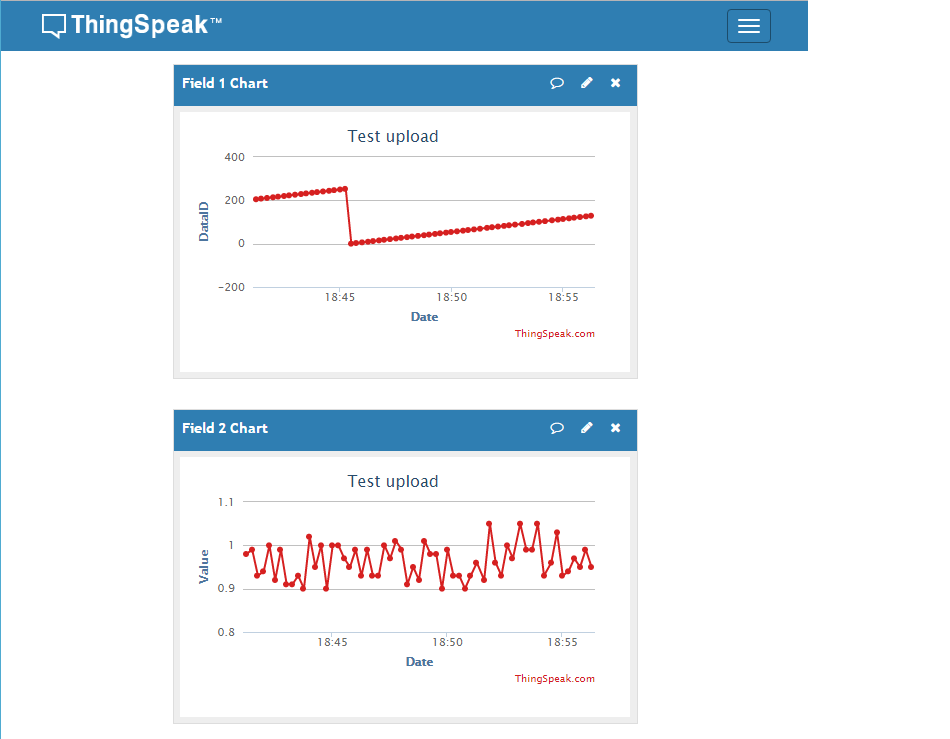
The display Chart on ThingSpeak